CI/CD Pipeline for Java Application with Amazon ECS + Amazon ECR

I am a highly-motivated and very enthusiastic cloud architect, who's passionate about cloud technology and believes the cloud to be a game changer in a fast-changing world.
What is CI/CD?
CI/CD (Continuous Integration and Continuous Delivery/Deployment) pipeline is an automated software development practice that helps to improve the quality of software development, increase the speed of the delivery process, and reduce the risk of deployment. The CI/CD pipeline is a series of automated steps that build, test and deploy software changes.
Why do we need it?
There are several reasons why we need a CI/CD pipeline for a Java application:
Faster and more frequent releases: With a CI/CD pipeline, developers can quickly test and deploy changes, which leads to faster and more frequent releases.
Improved software quality: Automated testing and code reviews help to improve software quality by detecting issues early in the development process.
Better collaboration: CI/CD pipelines encourage better collaboration between developers, testers, and operations teams.
Reduced risk: Continuous testing and monitoring help to reduce the risk of software failures and downtime.
Cost savings: A well-designed CI/CD pipeline can help to reduce the cost of software development by automating repetitive tasks and reducing the need for manual intervention.
Implementation:
In order to complete this project it is recommended to have a general understanding of AWS, Docker, Jenkins, and Git.
In this project, we will be building CI/CD pipeline for a Java application that will continuously build images and publish them to ECR, and from ECR it gets deployed to ECS.
This project doesn’t focus on the basic installation of Jenkins. But, if your Jenkins is not setup use the following link:-
Tools used:
Jenkins
Maven
Git
Docker
ECR
ECS
AWS CLI
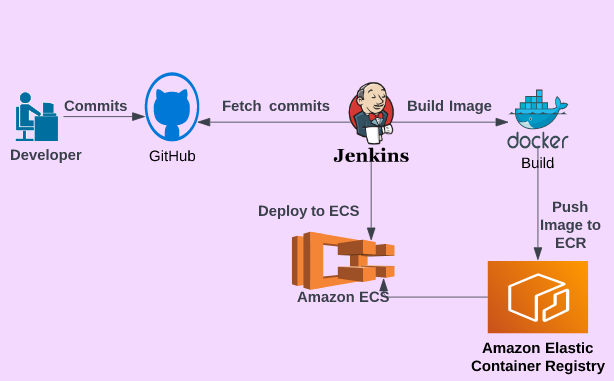
The flow of Execution for Jenkins Pipeline
Whenever Developer makes any commit in the source code
Jenkins fetches the code
Build docker image
And, push it to Amazon ECR
Create Jenkins files
Use AWS CLI from Jenkins to deploy the latest image from Amazon ECR and deploy it to Amazon ECS stagging Cluster.
Once, tested and approved in staging.
Repeat the steps for the Production cluster.
Setup webhook for git repository
Create a repository in git.
Go to the repository.
go to repository settings.
in the payload, the URL mentions “your virtual machine IP”:8080/github-webhook/

Setup Amazon Elastic Container Registry
Go to AWS Console or use AWS CLI
We will be using AWS Console
Create repository
copy URI it will be used in the Jenkins script

Setup ECS
Go to ECS from the Management console
Create Clusters staging.
We will be going with fargate serverless environment
Create Task definition
Create service from task definition
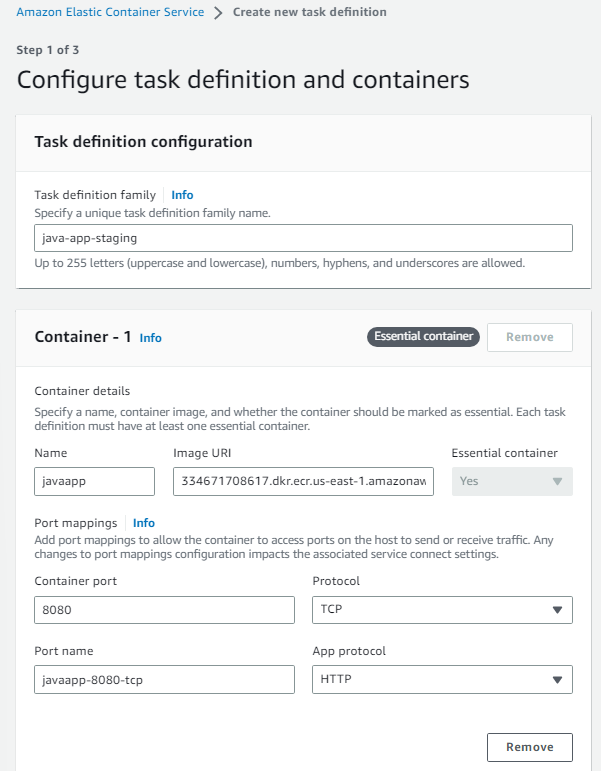
Task Definition Setup for ECS
Configure task definition.
Click on next and click on create.
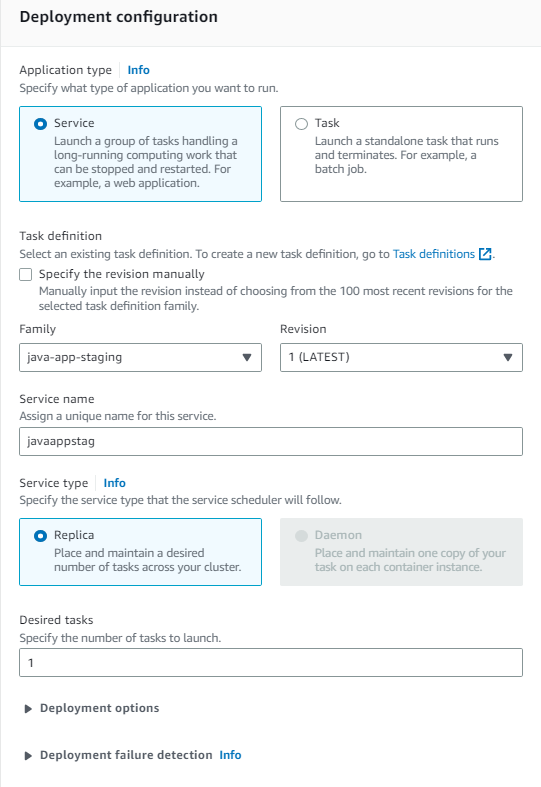
Create Service from Task definition
Leave everything on default in the Environment
In the Deployment configuration select service
In Networking create a security group with inbound traffic on 8080.
Click on Create

Setup Jenkins Pipeline for the Webhook Repository:
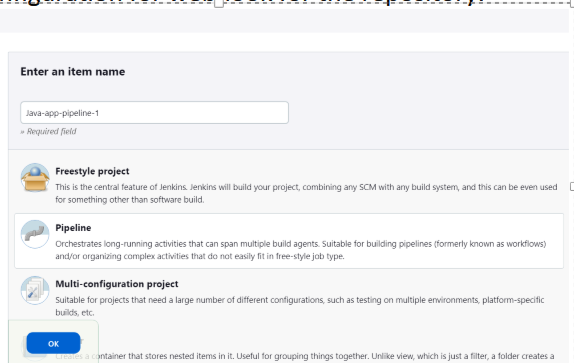
In your, Jenkins click on + New Item
Select Pipeline- “Pipeline”
Enter an “Item Name”
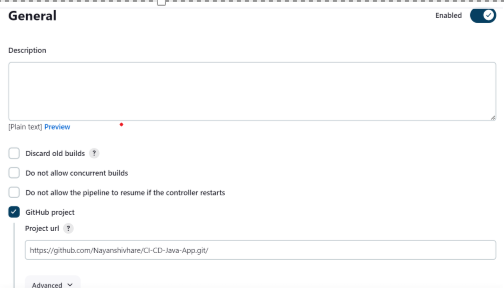
In General, select the GitHub project
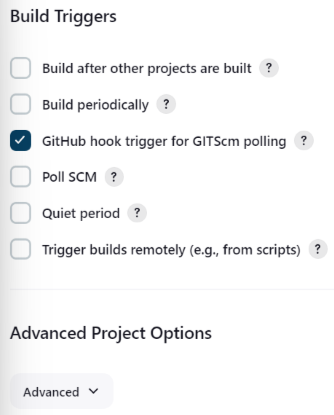
In “Build Triggers” select the “GitHub hook trigger for GITScm polling”
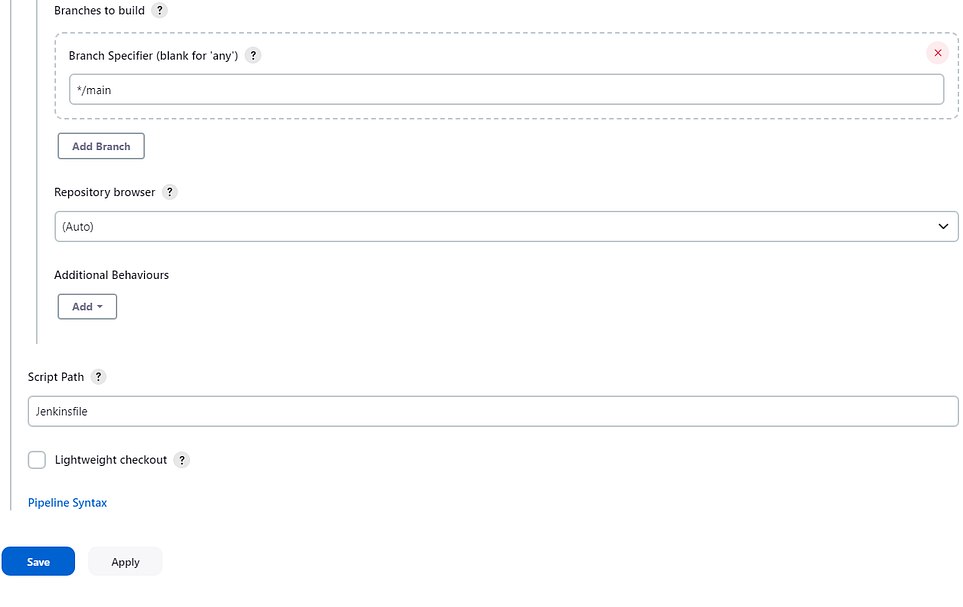
In the pipeline definition select “Pipeline script from SCM”
Select SCM as Git
Enter “Repositories URL”
In “Branches to Build” specify Branch Specifier */main
Give script path.

Install Docker on the Node your Jenkins server is running. In my case EC2 Instance:
Jenkins will be used to run the docker image but the machine will require an engine in order to build the image.
# After Installation
# run the following commands or your will get error with permission for Jenkins user
  Su - jenkins

# Add jenkins into docker
usermod -aG docker jenkins

# restart ec2 instance.
Install Plugins in Jenkins
Docker Pipeline
CloudeBees Docker Build and Publish
Amazon ECR
pipeline: AWS Steps
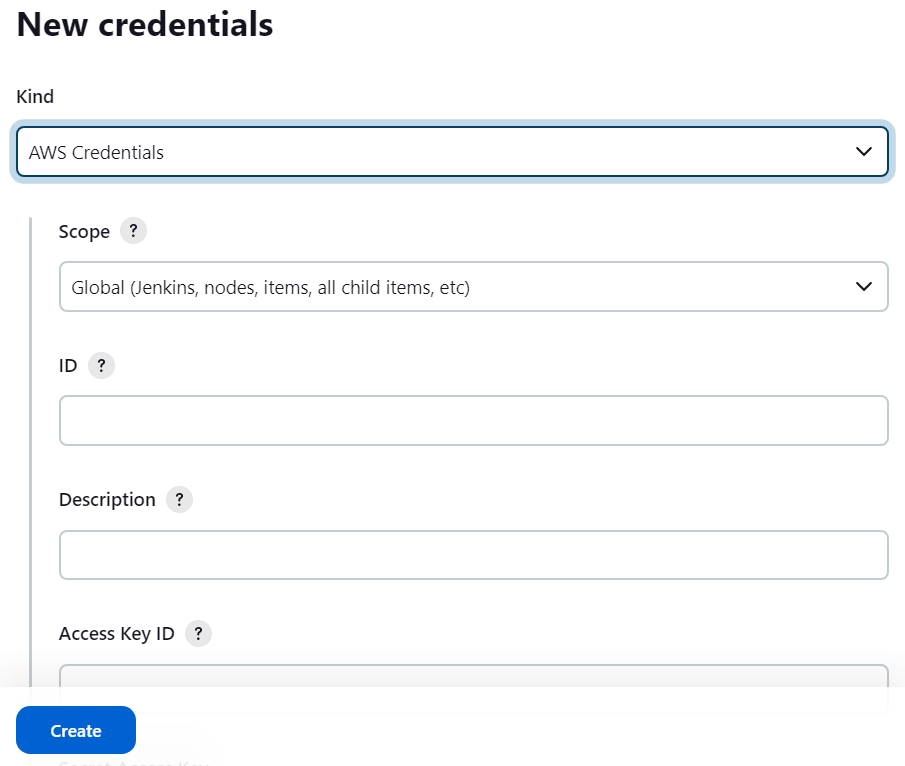
Setup AWS Credential in Jenkins
Go to manage Jenkins
Credential
Select Global credential
Add new credential
Jenkins File
def COLOR_MAP = [
    'SUCCESS': 'good',
    'FAILURE': 'danger',
]
pipeline {
    agent any

    environment {
        registryCredential = 'ecr:us-east-1:awscreds'
        appRegistry = '334671708617.dkr.ecr.us-east-1.amazonaws.com/myregistory'
        awsRegistry = "https://334671708617.dkr.ecr.us-east-1.amazonaws.com"
        cluster = "Stagging-Environment"
        service = "java-app"
    }

    stages {
        stage('Build App Image') {
            steps {
                script {
                    dockerImage = docker.build( appRegistry + ":$BUILD_NUMBER", "./Dockerfiles/App/")
                }
            }
        }

        stage('Upload App Image') {
          steps{
            script {
              docker.withRegistry( awsRegistry, registryCredential ) {
                dockerImage.push("$BUILD_NUMBER")
                dockerImage.push('latest')
              }
            }
          }
        }
        stage('Deploy to ECS staging') {
            steps {
                withAWS(credentials: 'awscreds', region: 'us-east-1') {
                    sh 'aws ecs update-service --cluster ${cluster} --service ${service} --force-new-deployment'
                }
            }
        }
    }
}
Dockerfile
FROM openjdk:8 AS BUILD_IMAGE
RUN apt update && apt install maven -y
RUN git clone -b vp-docker https://github.com/imranvisualpath/vprofile-repo.git
RUN cd vprofile-repo && mvn install

FROM tomcat:8-jre11

#remove default
RUN rm -rf /usr/local/tomcat/webapps/*

#copy build
COPY --from=BUILD_IMAGE vprofile-repo/target/vprofile-v2.war /usr/local/tomcat/webapps/ROOT.war


EXPOSE 8080
CMD ["catalina.sh", "run"]
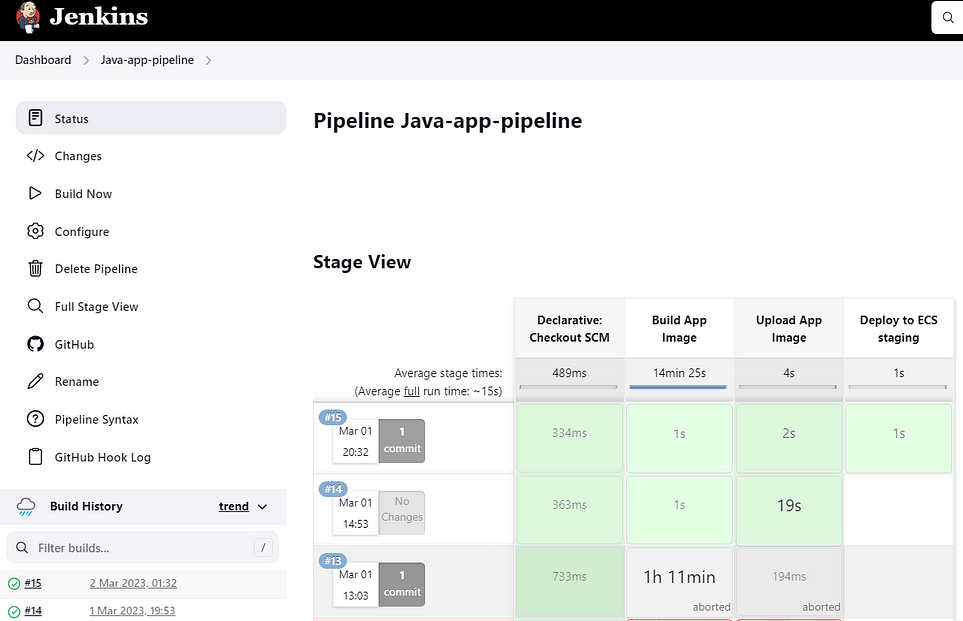
Final view of Pipeline