Continuous Cost Optimization for running Infrastructure in AWS

I am a highly-motivated and very enthusiastic cloud architect, who's passionate about cloud technology and believes the cloud to be a game changer in a fast-changing world.
We all hear a lot about cost optimization using various instance purchasing techniques, using reserved instances, spot instances, auto-scaling groups, Caching, and so on.

“But what if you have joined as a solution architect or cloud engineer and you are assigned to audit and come up with a report that includes techniques you can implement to reduce the cost of EBS, EC2, and S3 for already running infrastructure.”
We can achieve our goal using basic principal and some AWS-managed services.
The Main area of focus:
Tagging- with the help of the tag editor
EBS snapshot cost optimization- with the help of Amazon Data Lifecycle Manager
Rightsizing EC2 Instance- with the help of compute optimizer
Optimizing S3 cost- Lifecycle policy and storage lens.
Most important Task- Tagging:
Check for the resources that are not tagged. Tag all the resources within your organization.
Tags consist of key-value pairs that provide additional information about the resources.
Here are some reasons why tagging is important:
Cost Management: By using tags, you can track your AWS costs and identify which resources are consuming the most resources.
Resource Management: Tagging helps you manage your resources more efficiently. For example, you can use tags to identify which resources belong to a particular project, department, or environment (such as production, staging, or development).
Security: Tags can be used to help identify resources that contain sensitive data. You can use tags to label resources that contain Personally Identifiable Information (PII), financial data, or other sensitive information. This helps you identify resources that need extra security measures.
Automation: Tags can be used to automate tasks such as resource provisioning, backups, and monitoring. You can use tags to trigger AWS Lambda functions which can automate routine tasks based on the tags assigned to resources.
Use AWS Resource Group and tag editor to tag your resources based on your requirement. And, also use tag policies to enforce tagging.
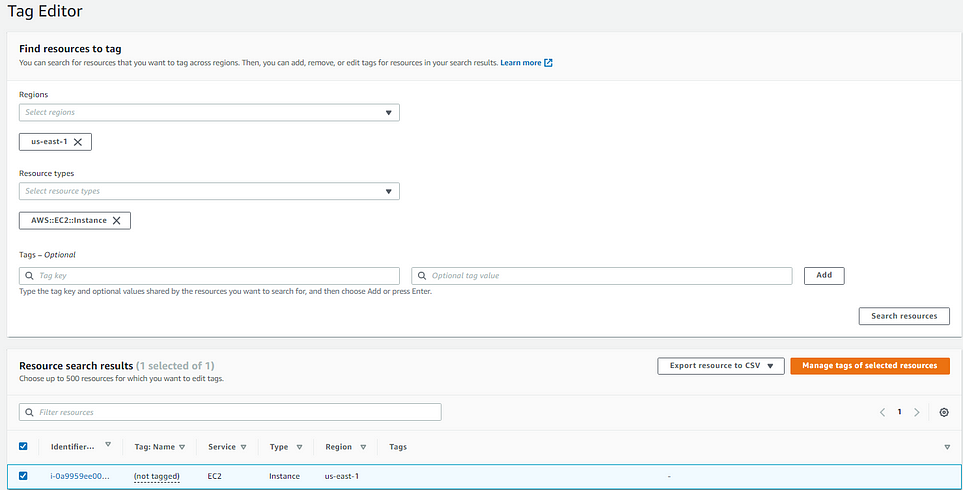
Untagged resource, you can also make a CSV of your resources.
- Click on manage tags of selected resources
2. Add tags
3. Click on review and apply tag changes
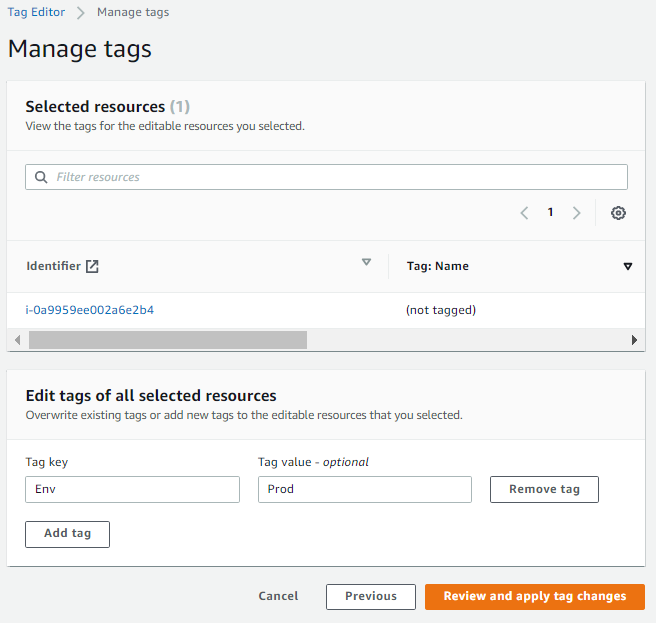
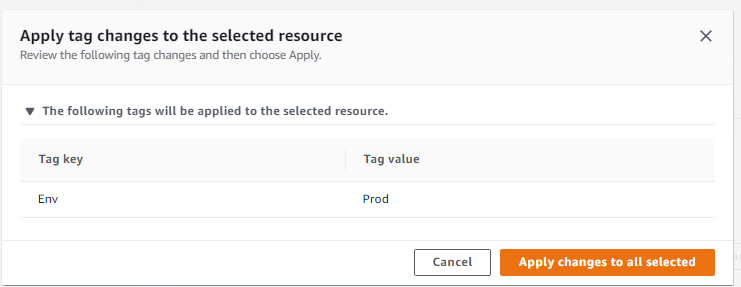
4. Click on Apply changes to all selected.
Task 1: EBS snapshot cost optimization
In order to optimize the EBS snapshot and reduce the cost of storage you need to have a clear understanding of the Recovery Point Objective(RPO), and Retention Period for Production and Development volumes.
For Production volumes, we have RPO of 1hour and a retention period of 1 day.
For Dev volumes RPO of 1 hour and a retention period of 6 hours.
Tools used:
- Amazon Data Lifecycle Manager
Steps to perform
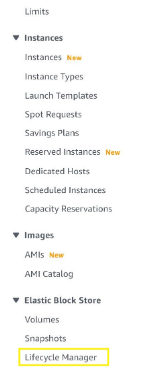
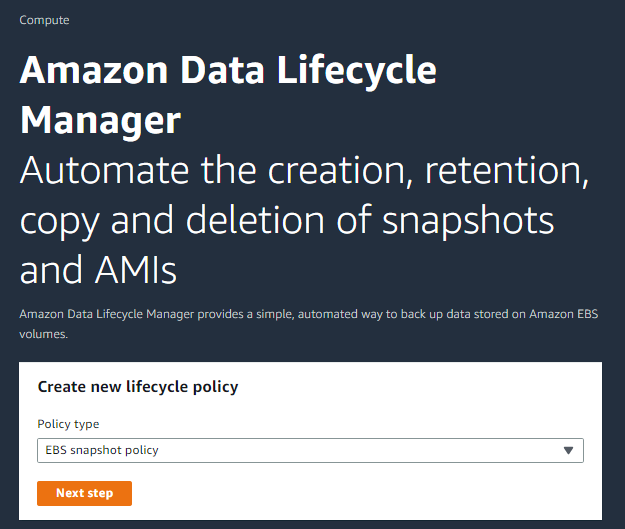
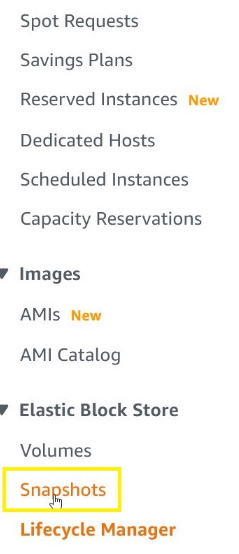
Open the EC2 console page
Click on Lifecycle Manager on the left side menu
3. Check Amazon Data Lifecycle Manager and you found out there are no policies defined. So, we need to set up a policy to automate snapshot management.
4. Check snapshots
5. Filter snapshots using the environment tag key
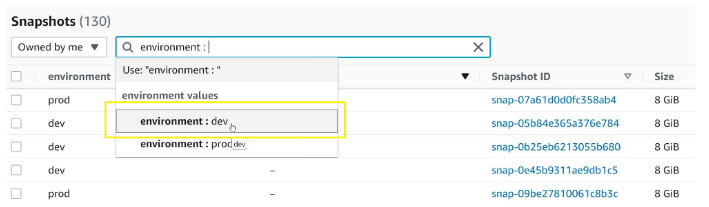
6. Filter both dev and prod
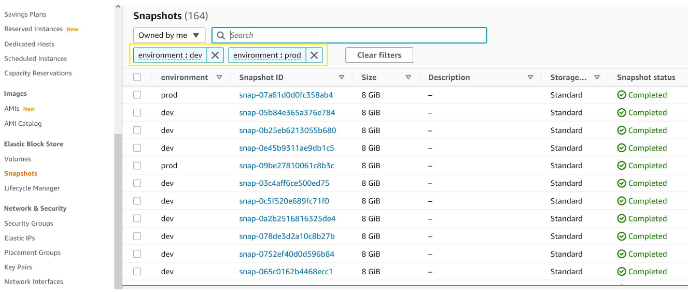
7. These are the snapshots that are not managed automatically so we will define policy based on RPO and Retention Period for the prod as well as the dev environment.
8. Click on Data Lifecycle Manager and click on next
9. Click on Target resource tags and select environment.
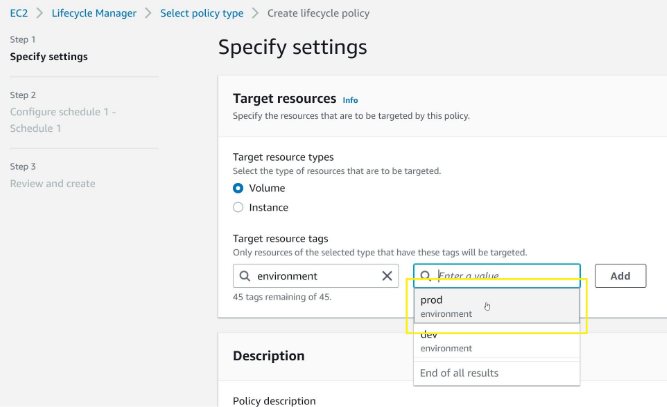
10. Click “Add” to confirm
11. In the Description give the description
12. Select the IAM role as the Default
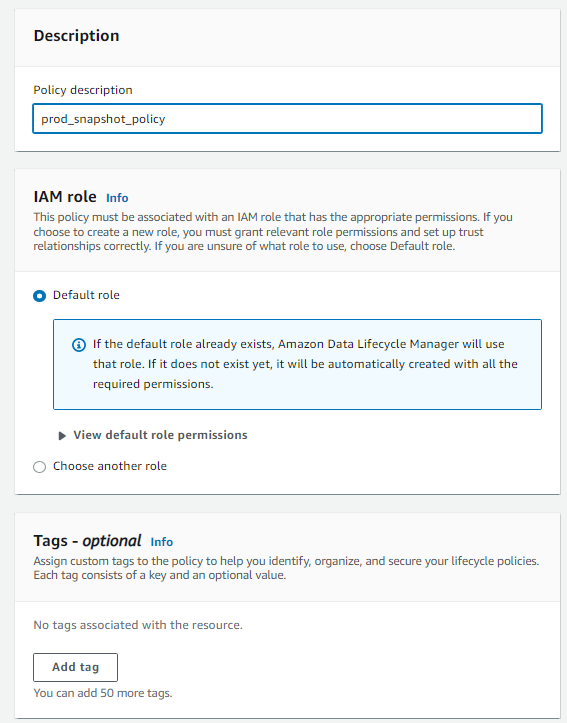
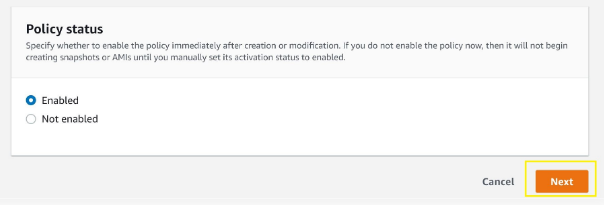
13. Policy Status as “Enabled” and click on Next
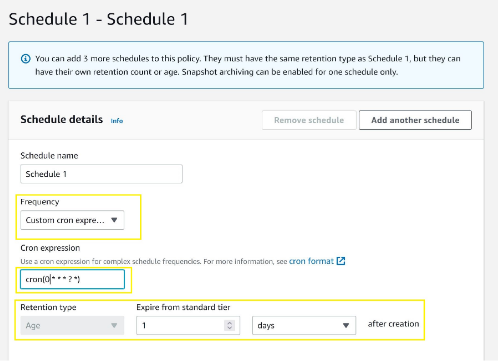
14. Select “Custom cron expression”, use cron(0 * * * ? *) to trigger the snapshot copy every hour, and define a retention type based on "Age" and expiration after 1 day.
15. On advanced settings expand tagging and select copy tags from the source.
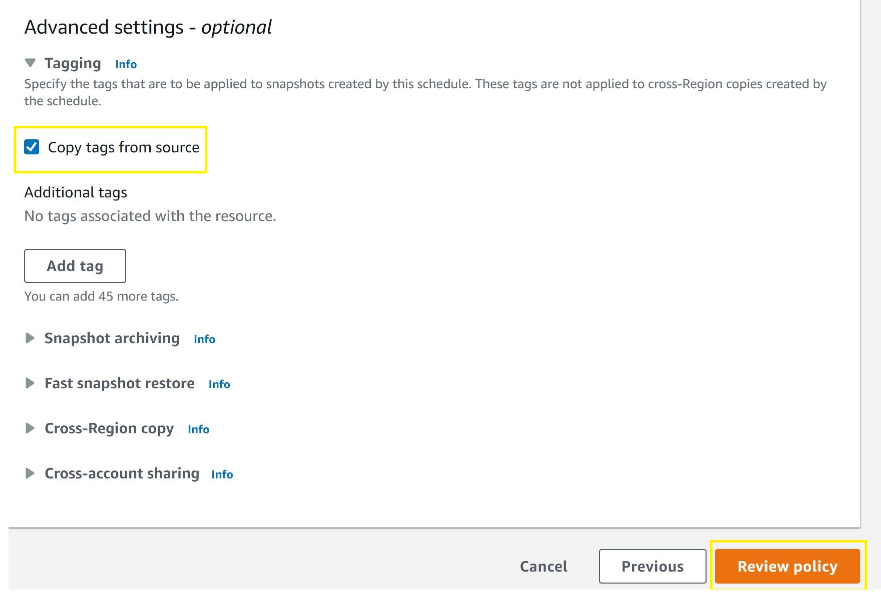
16. Click on “Create policy”
17. Policy should be enabled

18. Repeat steps 9–16 of creating policy and make sure to use the parameter for dev environment.
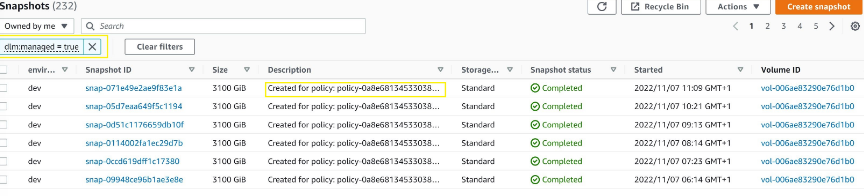
19. After few hours of our policies creation check snapshot with tag key dlm:managed set to a value of "true".
20. Last stage creates a script to clean up resources that are not compliant snapshots using CloudTrail event and Lambda. (Not covered in this project)
Result
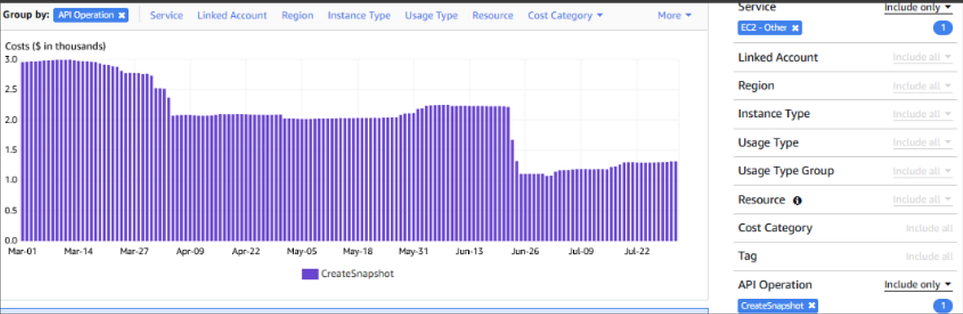
Use the cost explorer to check the cost of snapshot storage. It can take a day or two to show up.
For enterprises that uses AWS heavily costs can effectively go down from 3k to 1.5k per month.
Task 2: Rightsizing EC2 Instance
Rightsizing EC2 instances doesn’t only mean scaling down it also means scaling up under-provisioned resources.
Be very careful about workload compatibility while rightsizing instances.
Changing the instance type is a reversible process. However, it’s a good practice to make regular backups of your persistent disk data before performing mutating actions.
Consider taking a snapshot of your Amazon Elastic Block Store (Amazon EBS) volumes before changing the instance type.
Tools Used:
Compute Optimizer
Steps to perform
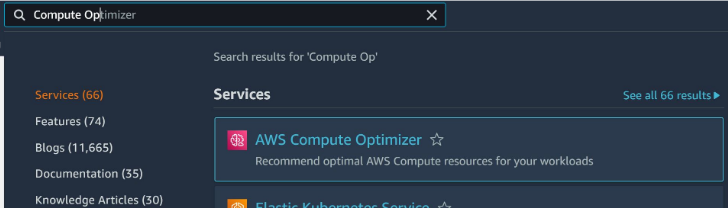
- Search for Compute Optimizer
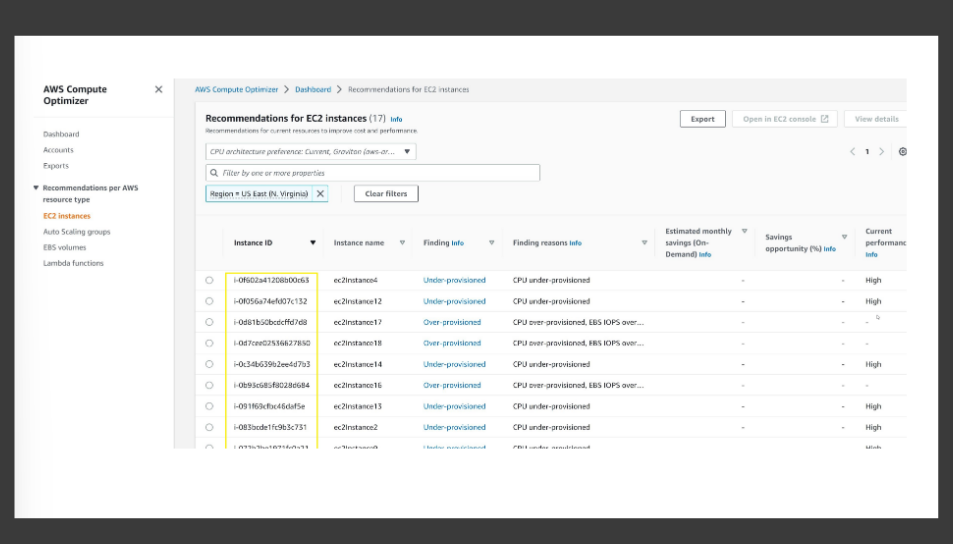
2. Click on EC2 instances
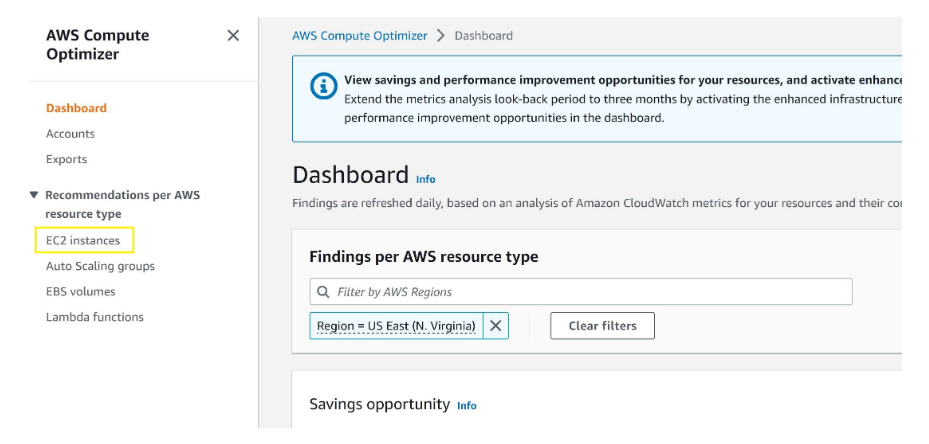
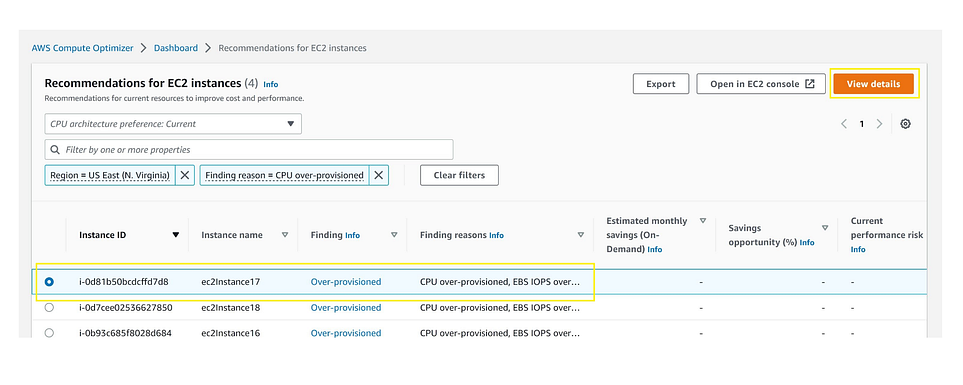
3. You are seeing a list of Ec2 instances with potential optimizations
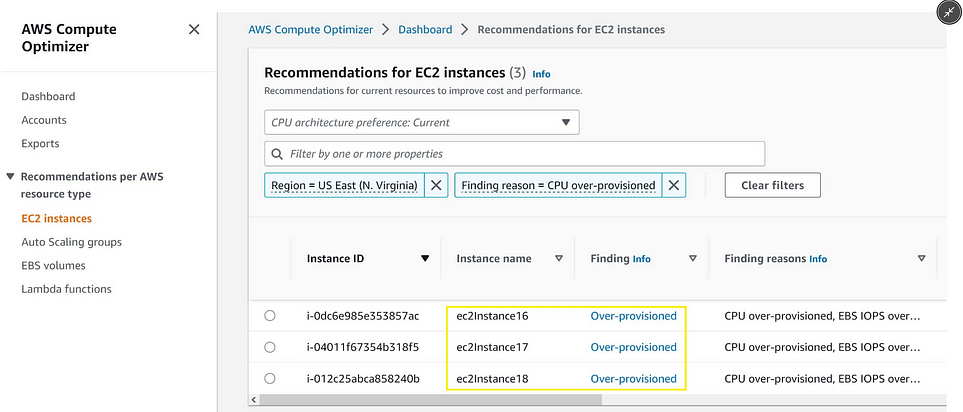
4. Click on filter searchbox and select “Finding reason” to select “CPU over-provisioned”, it will display EC2 instances that could be downsized.
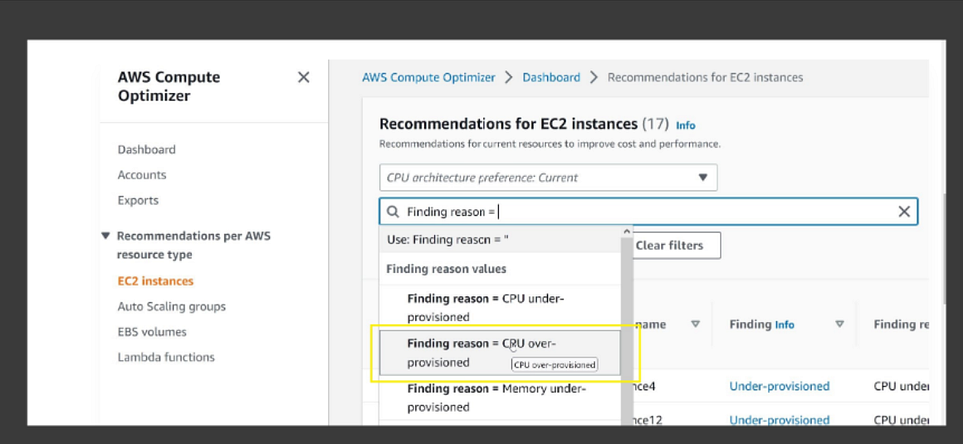
5. You will see a list of instances with CPU over-provisioned.
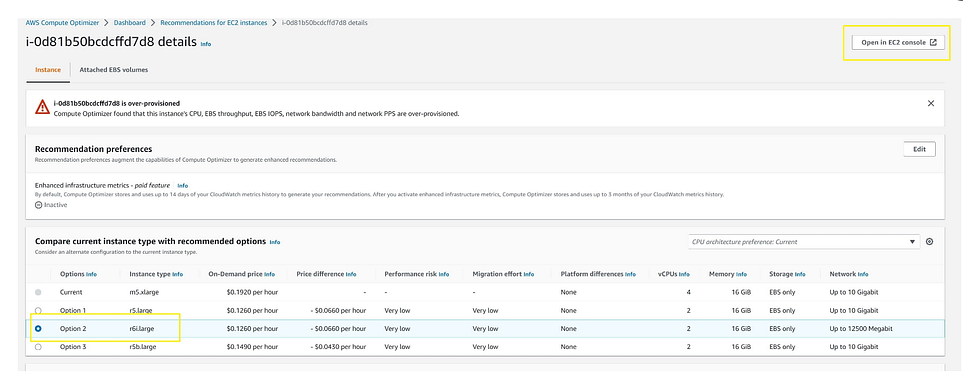
6. Select instance and click on “View details
7. Select the instance that will give you the best savings, check ec2 pricing for that. Click on “Open EC2 console to proceed with changes.
r6i.large which provides a 34% savings on hourly price and reduces the vCPU count from 4 to 2, keeping the same amount of memory and also improving the network bandwidth.
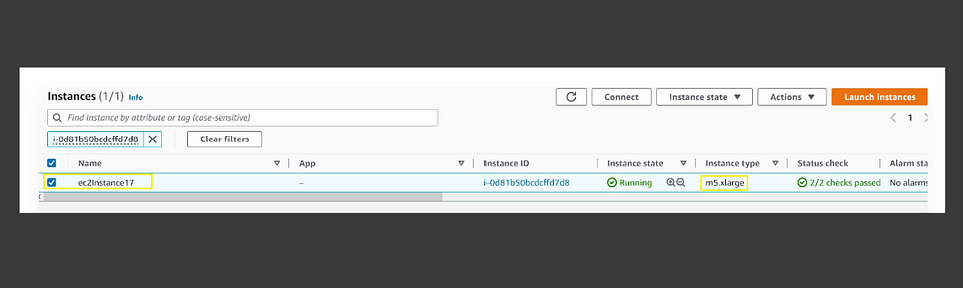
8. In ec2 console select the instance and make sure it is the one we are targeting in Compute Optimizer(m5.xlarge)
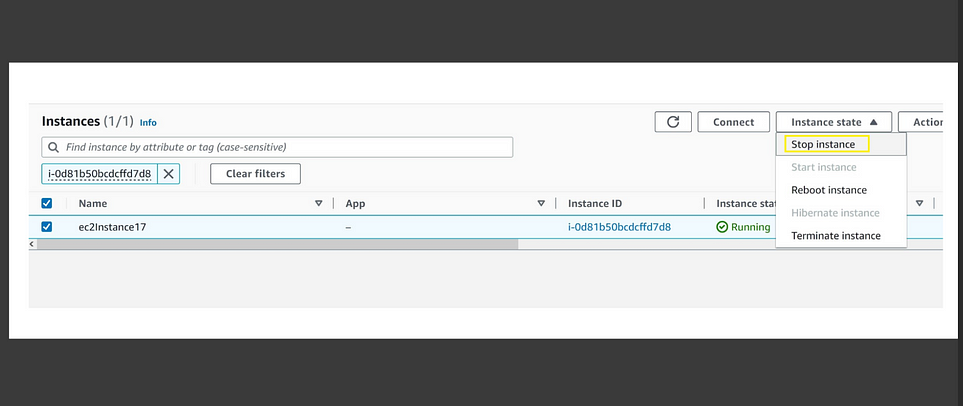
9. Click on “Instance state” on the top right part of the console and select “Stop instance”
Perform this step outside of business our make AMI and launch new instance from that AMI for zero down-time.
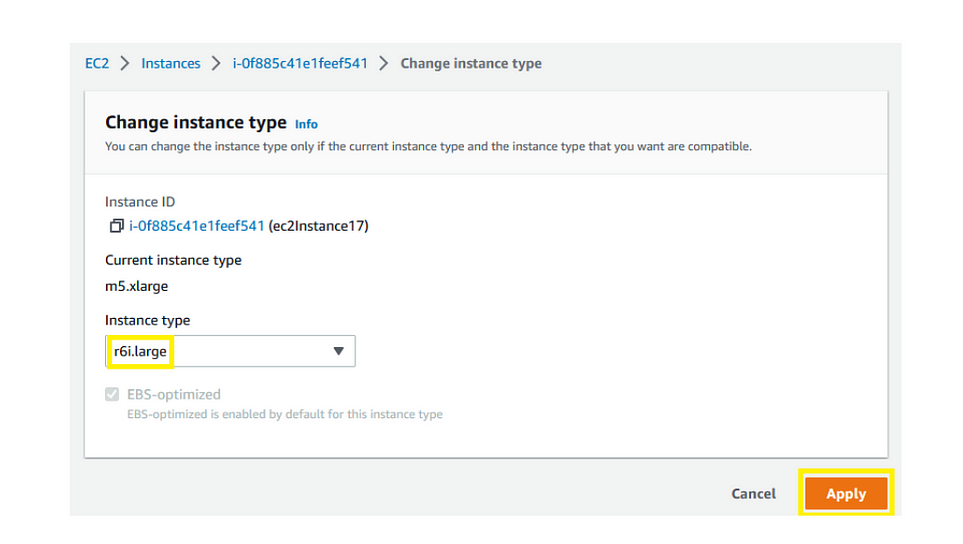
10. Change the instance type by clicking on “Actions”, “Instance settings” “Change instance type”

11. Select r6i.large as the new instance type and click “Apply”
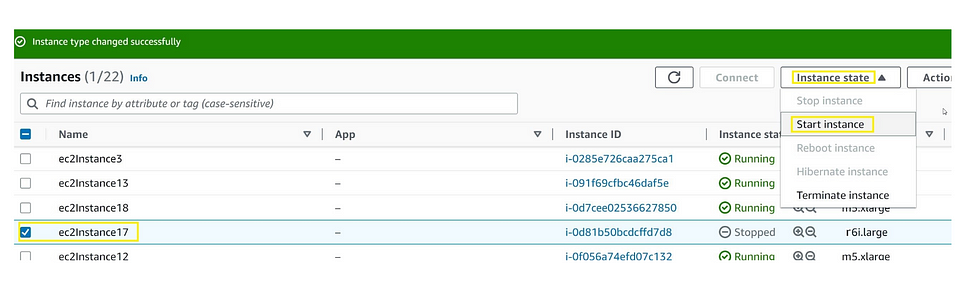
12. Select the instance you have just resized, and start it by clicking on “Instance state”, “Start instance” on the top right of the console.
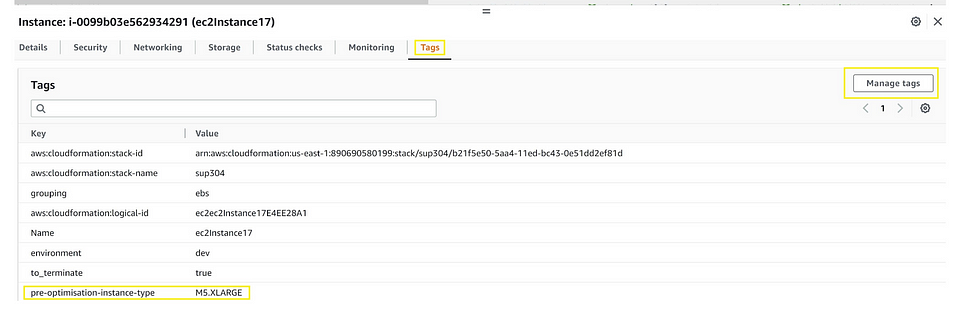
13. Check the instance starts correctly and make sure that the instance you have resized is selected, then open the “Tags” tab, in the instance detail section at the bottom of the screen, click on “Manage tags”
13. You can automate the whole process using system manager automation, by using “AWS-ResizeInstance” automation.
Result
Using cost explorer after 2 days check for the savings we have achieved after the right sizing.

Task 3: Optimizing S3 cost
Identify buckets with incomplete multipart uploads. And, apply lifecycle policy to the buckets to delete the incomplete multipart uploads at scale.
Pre-requisite
S3 storage lens setup it will analyze storage metrics.
Steps to perform
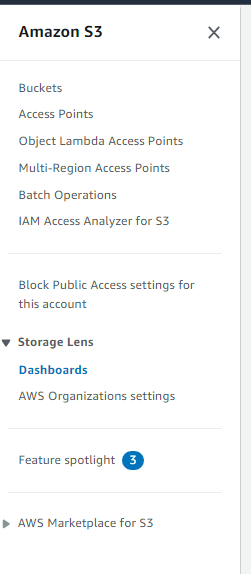
- Select storage lens Dashboards
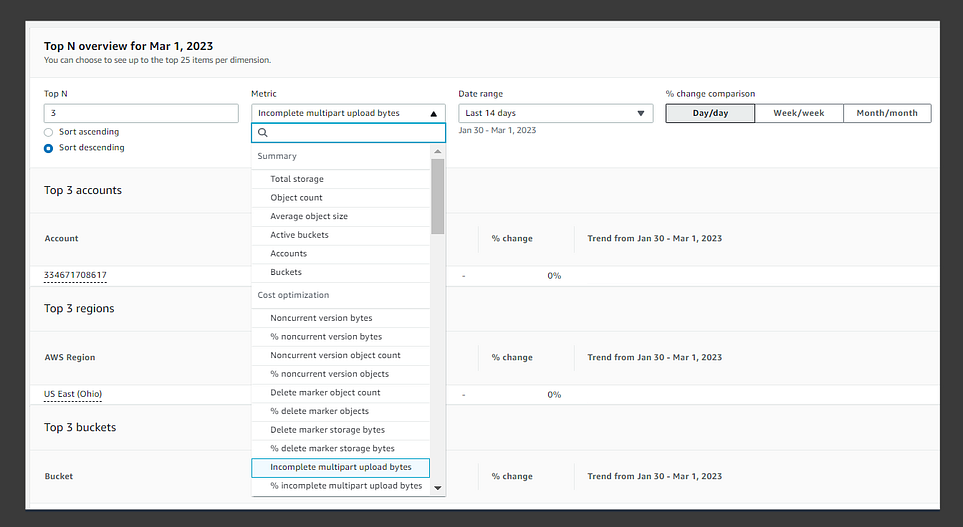
2. After creating the dashboard,( you will see data after 48 hours. )Select your dashboard and scroll down to the Top N overview section. For Metric, choose Incomplete Multipart Upload Bytes.
You can select date range based on your use case
3. We have one bucket that has objects that have not been uploaded correctly. These partially uploaded objects will be billed but they will not likely be usable.
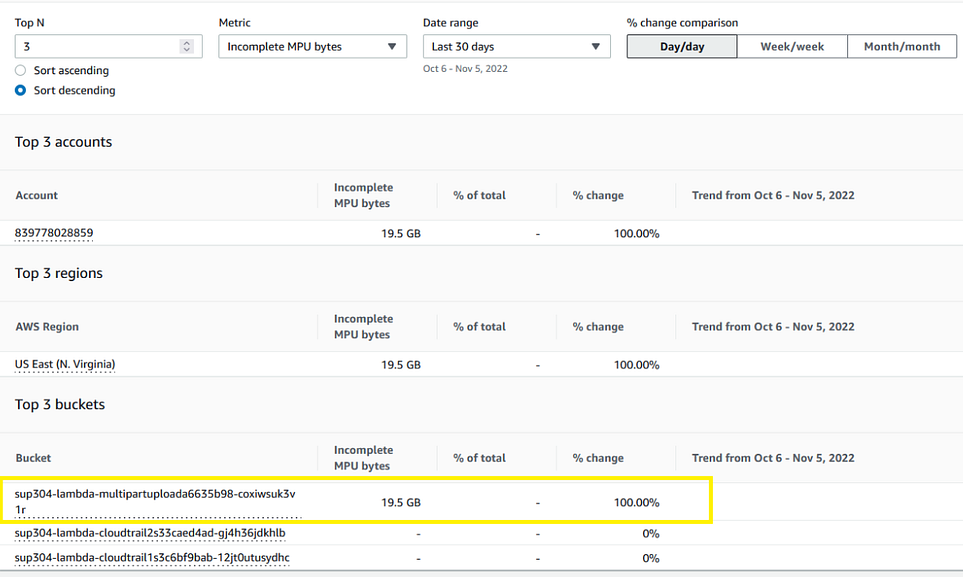
Implment lifecycle policy for that bucket to automatically delete incomplete multipart Uploads.
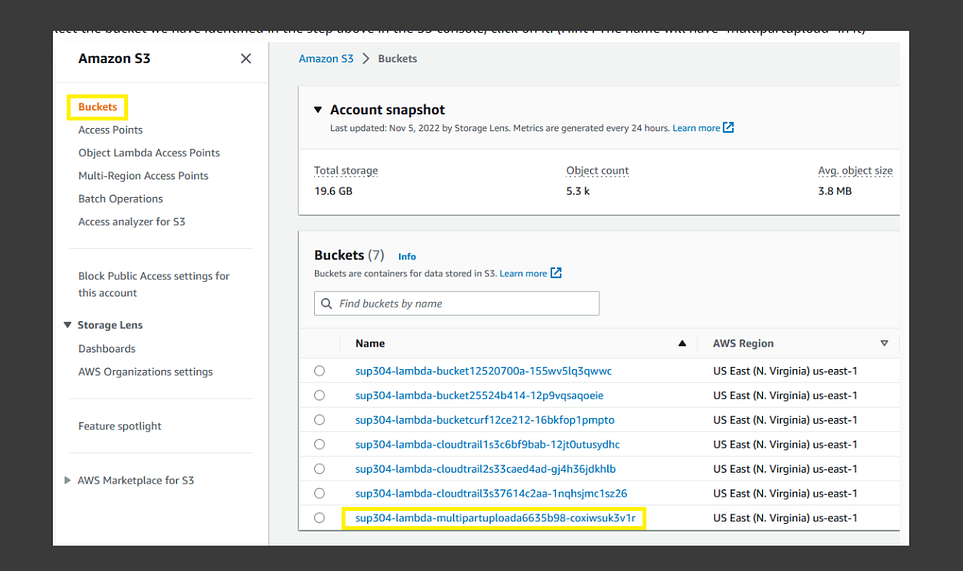
- Go to buckets we have identified.
2. Select the Management tab. Here we select Create lifecycle rule.
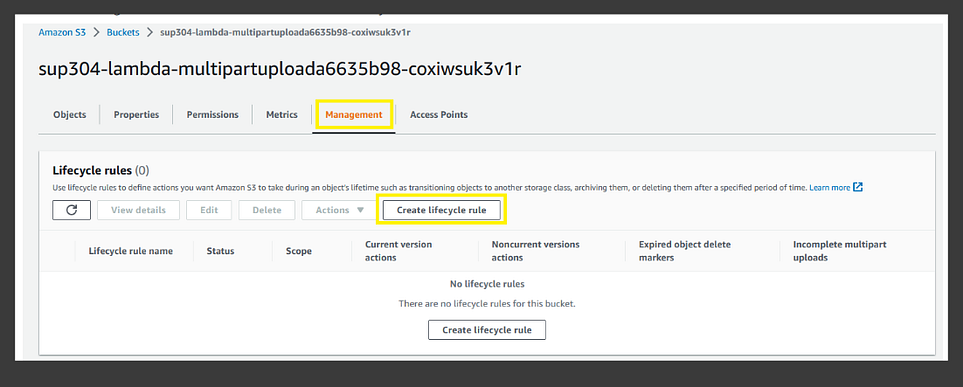
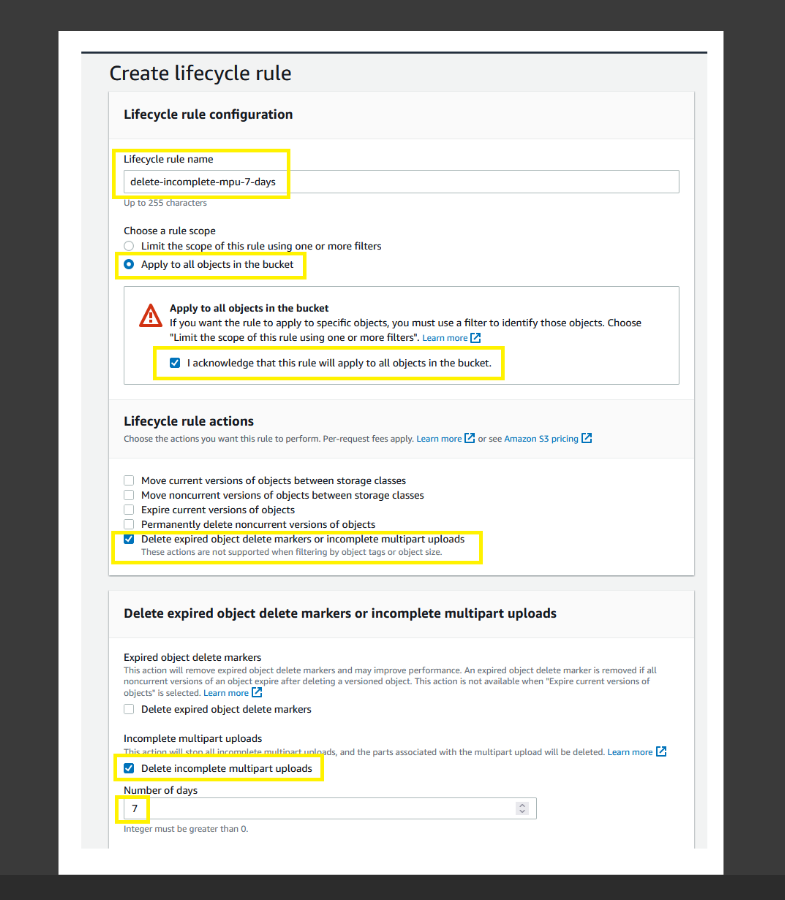
3. Give a name to the rule (i.e. delete-incomplete-mpu-7-days), then choose as scope Apply to all objects in the bucket and select the I acknowledge that this rule will apply to all objects in the bucket checkbox. As a Lifecycle rule action select Delete expired object delete markers or incomplete multipart uploads, scroll down and select Delete incomplete multipart uploads and use 7 as a Number of days, scroll down and click on the Create rule orange button.
4. You should now see your lifecycle rule created.
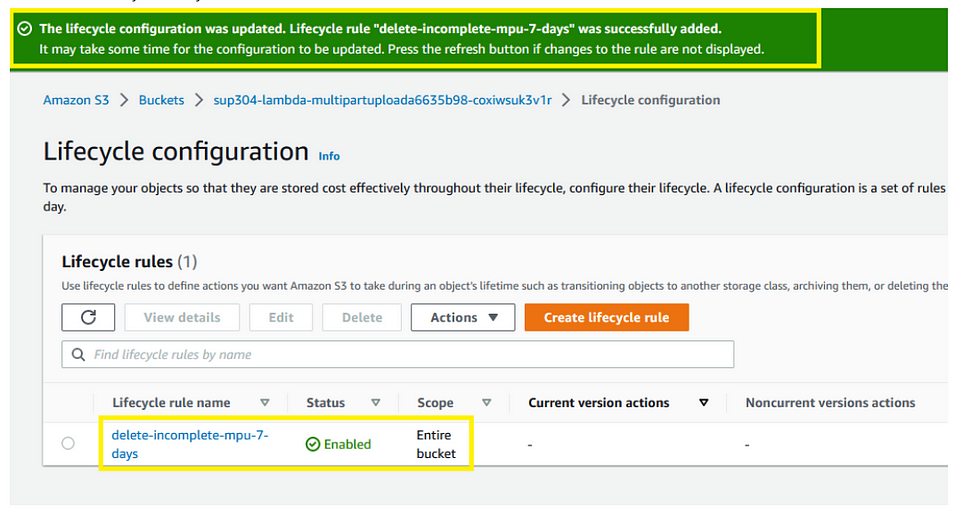
Result:
Your policy has been applied. And, any multipart not completed will be deleted automatically by the lifecycle rule.
Conclusion:
These are some of the most basic but effective techniques we can use to optimize cost for our running infrastructure.


