


Summary:
In this article, you'll discover everything you need to know about SonarQube, from its components to the installation process. If you've struggled with installing and running SonarQube in the past, rest assured that this step-by-step guide will work flawlessly for you.
What is SonarQube?
SonarQube is an open-source platform for continuous code quality inspection, code review, and analysis. It helps developers to identify and fix code quality issues early in the development process.
SonarQube supports multiple programming languages, including Java, C#, JavaScript, Python, PHP, and more. It uses a range of code analysis tools and plugins to detect various types of code quality issues, such as code smells, security vulnerabilities, and bugs.
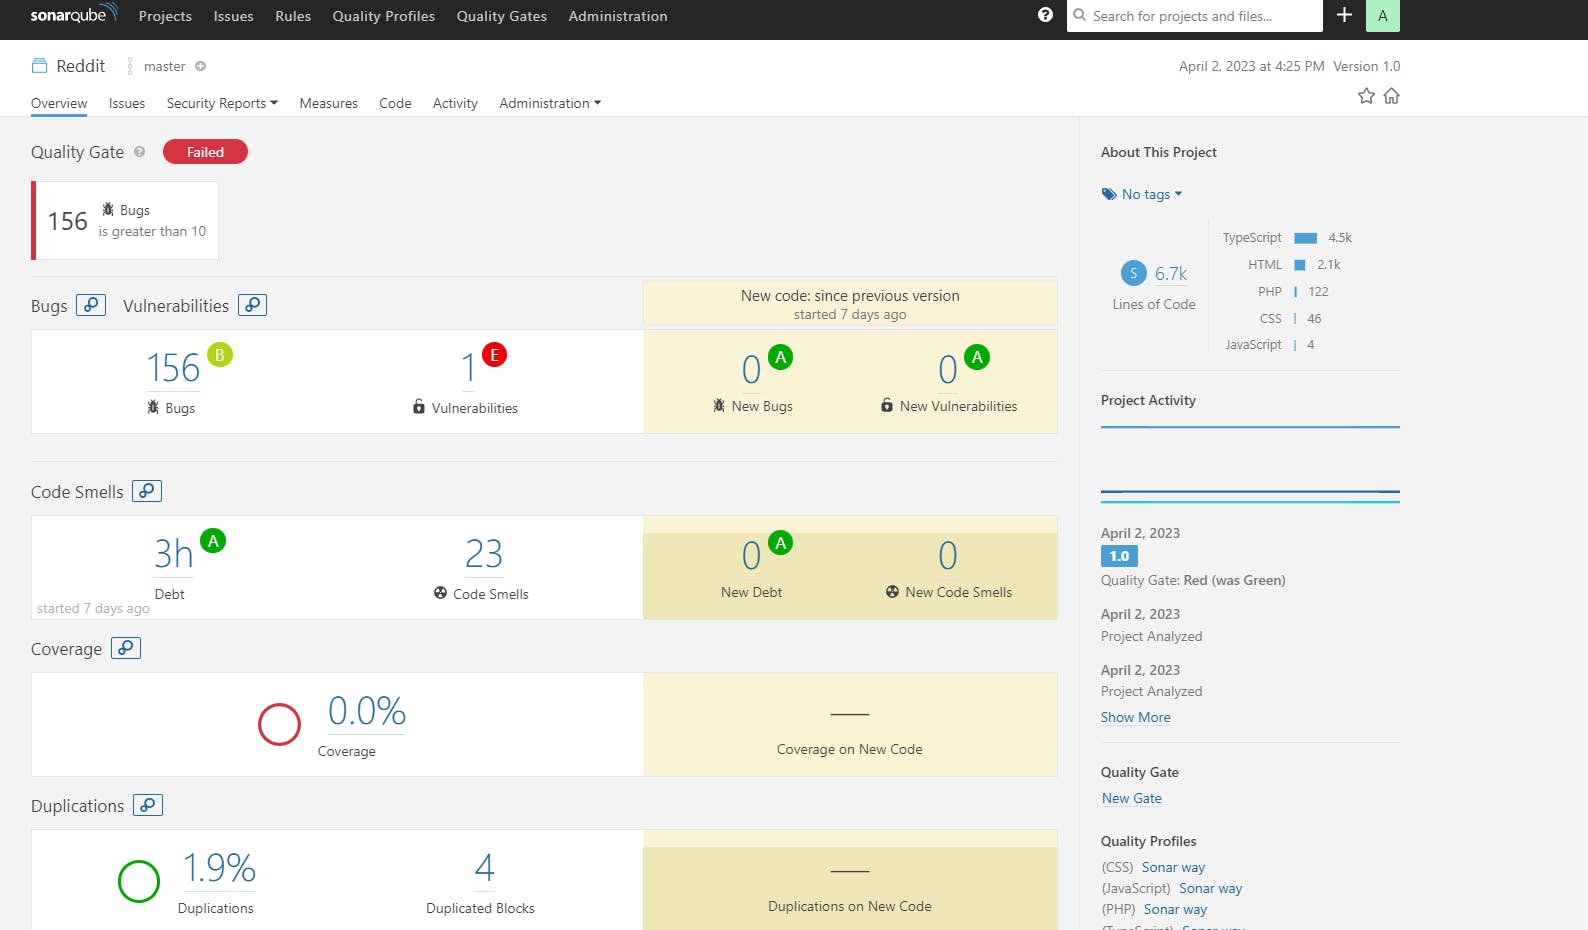
The platform provides a dashboard with a visual representation of the code quality metrics, including code coverage, complexity, and maintainability. It also offers features such as code duplication detection, code review, and integration with build tools like Jenkins, Maven, and Gradle.
By integrating SonarQube into the software development lifecycle, developers can improve the quality of their code, reduce technical debt, and ensure that their code meets industry standards and best practices.
Main Component
Quality Gate: It is a set of predefined rules and conditions that must be met for a project or code to be considered of sufficient quality. Quality Gates can be set for various conditions and metrics.
Complexity
Code Coverage
Duplications
Issues
Maintainability
Management
Reliability
Security
Size
Quality Profile: A quality profile consists of a set of rules, each of which is associated with a severity level. The severity level indicates how serious the violation of the rule is, and can be customized to suit the specific needs of the project or organization.
Benefits of using SonarQube:
Improved Code Quality: SonarQube enables continuous code inspection, identifying bugs, vulnerabilities, and other quality issues. It provides actionable insights into code quality metrics, allowing developers to quickly address issues and improve code quality.
Collaboration: provides a centralized platform for managing code quality, enabling collaboration between developers, testers, and other stakeholders.
Productivity: SonarQube helps automate many code-quality tasks, freeing up developers to focus on writing high-quality code.
Identifying and addressing code quality issues early in the development process, SonarQube helps reduce technical debt.
SonarQube Installation:
Follow these steps to install SonarQube on Ubuntu and integrate it into your software development lifecycle.
Launch Ubuntu Ec2 Instance.
Update your system:
 sudo apt update
 sudo apt upgrade
Install Java:
SonarQube requires Java to run. You can install Java using the following command:
sudo apt-get install default-jdk -yDownload SonarQube:
Download the latest version of SonarQube from the official website using the following command:
wget https://binaries.sonarsource.com/Distribution/sonarqube/sonarqube-9.9.0.65466.zipDownload unzip tool:
sudo apt install unzipUnzip the downloaded file:
sudo unzip sonarqube-9.9.0.65466.zip -d /optRename the downloaded file:
sudo mv /opt/sonarqube-9.9.0.65466 /opt/sonarqube -vPostgres Installation
 sudo sh -c 'echo "deb http://apt.postgresql.org/pub/repos/apt/ `lsb_release -cs`-pgdg main" >> /etc/apt/sources.list.d/pgdg.list'

 sudo wget -q https://www.postgresql.org/media/keys/ACCC4CF8.asc -O - | sudo apt-key add -

 sudo apt-get -y install postgresql postgresql-contrib
 sudo systemctl start postgresql
 sudo systemctl enable postgresql
Log in as a Postgres user
sudo su - postgresNow create a user below by executing the below command
createuser sonarSwitch to SQL shell by entering
psql

# enter below lines to create user and database:
ALTER USER sonar WITH ENCRYPTED password 'password';
CREATE DATABASE sonarqube OWNER sonar;
\q
Create group and user:
sudo groupadd sonarAdd a user with directory access:
sudo useradd -c "user to run SonarQube" -d /opt/sonarqube -g sonar sonar
sudo chown sonar:sonar /opt/sonarqube -R
Edit sonar.properties file
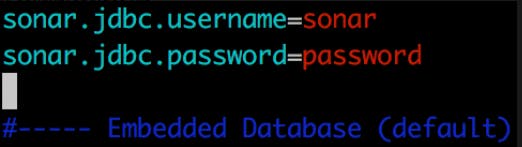
sudo vim /opt/sonarqube/conf/sonar.properties
#In the file uncomment the below lines by removing # and add values for following:

#Under section user credentials:
sonar.jdbc.username=sonar
sonar.jdbc.password=password

# Under section ----- PostgreSQL 9.3 or greater
sonar.jdbc.url=jdbc:postgresql://localhost/sonarqube
Press escape and type :wq! to exit vim.

Edit the sonar script file and set RUN_AS_USER to sonar otherwise it will give your an error.
 sudo vi /opt/sonarqube/bin/linux-x86-64/sonar.sh

 # Add:
 RUN_AS_USER=sonar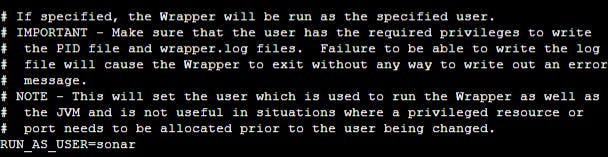
Create sonar as a service to start your server after restart
 sudo vi /etc/systemd/system/sonar.service

 # Copy and paste below code:
 [Unit]
 Description=SonarQube service
 After=syslog.target network.target

 [Service]
 Type=forking

 ExecStart=/opt/sonarqube/bin/linux-x86-64/sonar.sh start
 ExecStop=/opt/sonarqube/bin/linux-x86-64/sonar.sh stop

 User=sonar
 Group=sonar
 Restart=always

 [Install]
 WantedBy=multi-user.target
Our installation is completed, let's run the server.
 sudo systemctl start sonar
 sudo systemctl enable sonar
 sudo systemctl status sonar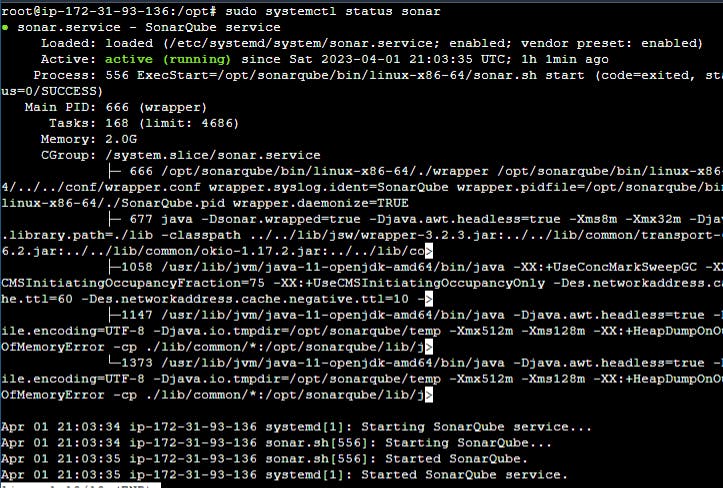
Restart your ec2 instance.
Make sure your security group is allowed on port 9000.
For accessing your sonarqube:
#Use this link in your browser
# use your ec2 publicip.
http://ec2publicip:9000
SonarQube Dashboard with your code result.